|
Send email invitations
|   |
Email invitations are email messages sent to one or several group of people with a link to a survey included in the messages. Email invitations to survey are managed in invitation groups. Each group of invitations includes at list one list of contacts and may include several lists. The initial invitation and the reminder invitations for an invitation group are sent based on the schedule set for the group. Tracking information detailing which invited people have clicked on the link to the survey or finished the survey is available in the invitation report.
After a group is setup and starts processing as detailed below, only a limited number of modifications can be made to the group. The list people invited or the email sending schedule for the group cannot be modified. To stop the processing of an invitation group, use the Inactivate tool in the invitation group list.
For details on all of the functions available for invitations, see email invitations.
To setup email invitations for a survey, follow the procedure illustrated below.
1. Create a list of people to invite to take my survey.
2. Populate the contact list with the contact information for the people to invite
3. Create an invitation group for the survey
4. Configure the invitation group
5. Monitoring of invitation group through the invitation report
1. Create a list of people to invite to take my survey.
To create the list, click the Contacts tab in the ribbon menu. If the contacts tab already contains the list of people to invite to take the survey, you can skip this step.

To create a new list in the address book, use the New List tool.
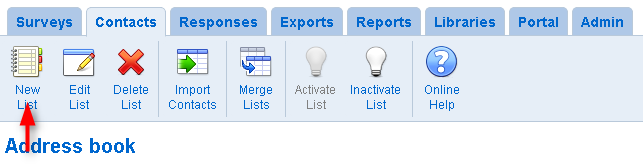
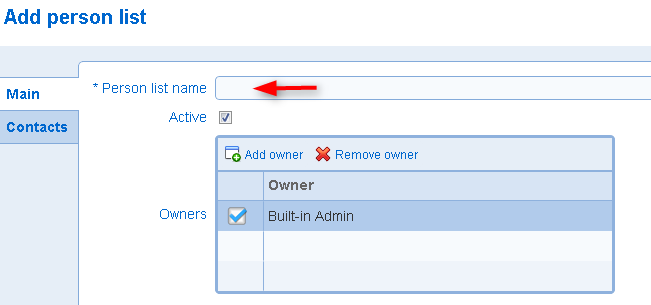
Enter a name for the list and save the list.
2. Populate the contact list with the contact information for the people to invite
Contacts can be imported into the list from a CSV or XLSX file using the Import contacts tool. For files with more than 1000 entries, the CSV format is recommended. Individuals can also be added to the list manually by editing the list and using the Add contact tool in the Contacts tab.
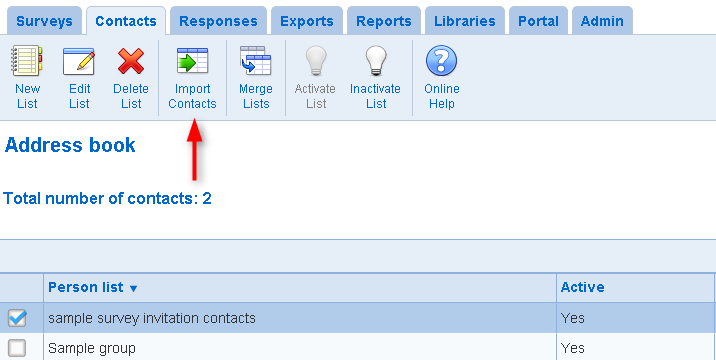
For lists with more than a few entries, population of the list through the upload of a file with the contact information of the people to invite is recommended. For details on the management of list of contacts, see Viewing and managing groups of contacts. In the upload window, the file to upload is specified by the choose file button (1). Note that the label on the button varies depending on the browser used to access the system. Additionally, a sample file is available that demonstrates the format expected for the contact data (2). Lines in the file that cannot be processed, if any, are shown when the file is specified. The list of contacts is populated with the data from the file (i.e., the 'good records') when the Save button is pressed in the file upload window.

3. Create an invitation group for the survey
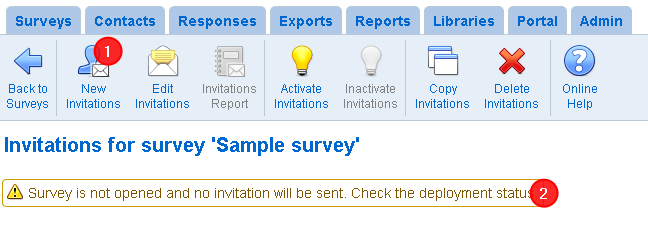
Click on the Surveys tab, select the survey, and click on the Invitations tool.
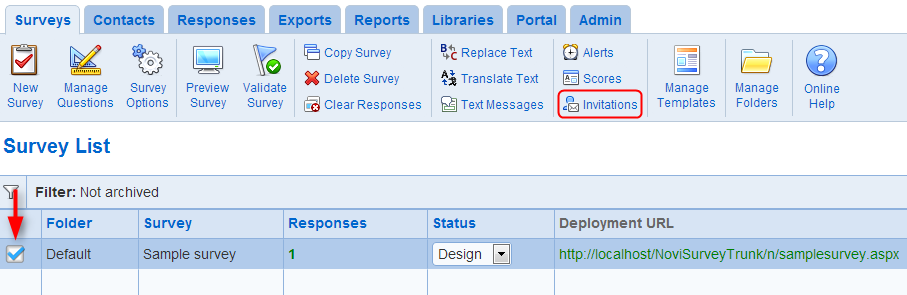
To create a new invitation group for the survey, use the New Invitations tool. Note that if the survey status is not open or if the date open and date closed options for the survey do not include the current date and time, a warning is displayed in the screen stating that no email invitation messages can released for the survey. In that situation, it is still possible to create invitation groups for the survey. However, the schedule for sending the invitations may not be respected. The status for the survey can be changed from the survey list screen or the survey options screen. The date open and date closed options are managed from the survey options screen.
4. Configure the invitation group
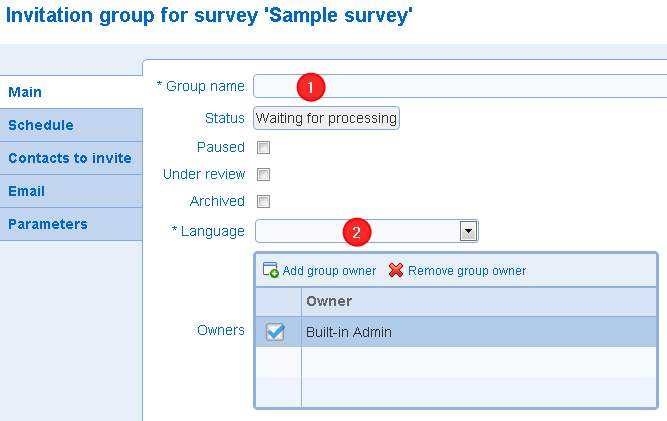
Define a name for the invitation group (1). The name of the group must be unique for the survey. If the survey is defined in more than one language, specify the language for the group (2).
Click the Schedule tab to define the message sending schedule.
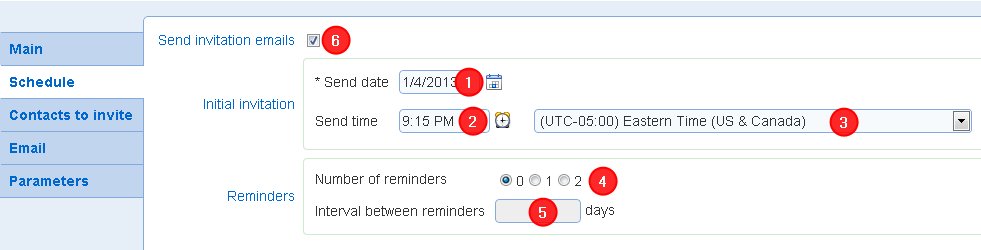
In the schedule tab, specify the date when the initial invitation email should be sent for the group (1), the time when the initial invitation email should be sent (2), and the time zone for the send time (3). Note that invitations are released in batches over time. For invitation groups including a large number of contacts, not all invitations may be sent at the date and times specified in the schedule. However, no invitation email will be released prior to the send day and time. Note also as explained above, other factors such as the deployment status for the survey can affect the release of invitation emails.
Reminder emails may be sent to people who have not yet responded to an invitation to take the survey. Reminders are defined through the number of reminder messages to send (4) and the number of days between reminder messages (5). If a participant respond to the survey by following the link included in a reminder, they will not be sent any further reminder. Also, a minimum number of days applies between reminders.
To create invitations in the system but avoid sending any email messages corresponding to the invitations, unselect option Send invitation emails (6). This option is useful when participants are communicated their invitation URL through means other than emails sent from the system. The invitation URLs for the contacts included in the group are available in from the invitation report for the group.
Once an invitation group starts processing (i.e., email invitations are released for the group), the group cannot be modified. A group will release invitation over time until all invitations and reminders for the group are sent.
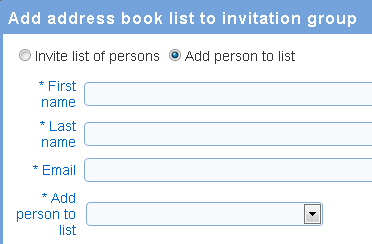
The contact to invitation for the invitation groups are specified in tab Contacts to invite.
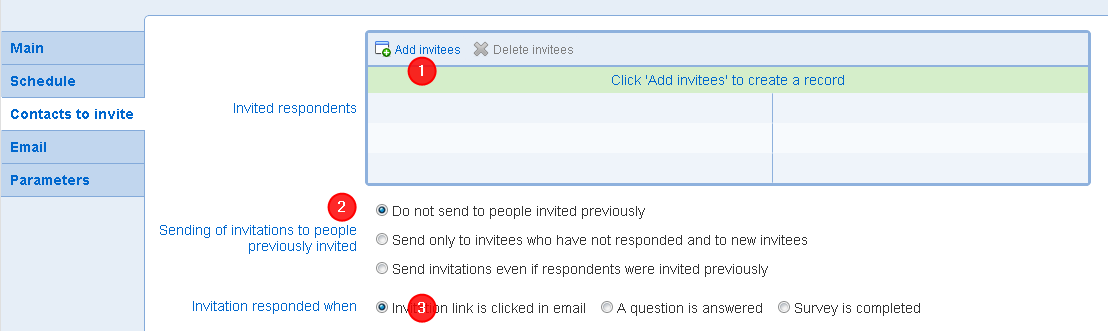
To add a list of contacts or a new contact to the group, use the Add invitees tool (1). The list of contacts that can be added to an invitation group correspond to the list of contacts in the 'Contacts' tab to which you have access.
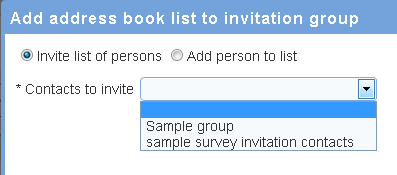
A single contact can be defined and added to a list of contact through option 'Add person to list'. Through this option, a contact is defined added to a list in the contacts tab and the list is added to the invitation group.
The sending of duplicate invitations to a given contact is controlled by option 'Sending of invitations to people already invited' (2). The option defines three different levels that either allow or suppress the sending of duplicate invitations. For details on duplication invitations see Invitation Group - Invited contacts.
The sending of duplicate invitations to a person depends on whether they have responded to the invitation. Option 'Invitation responded when' (3) defines the specific event that corresponds to such a response. In addition to affecting the sending of initial invitations and of reminders, option 'Invitation responded when' influences the invitation report for the group. For more details on option 'Invitation responded when see Invitation Group - Invited contacts.
The Email tab in the invitation group specified the subject and text for the invitation and reminder email subject and body.
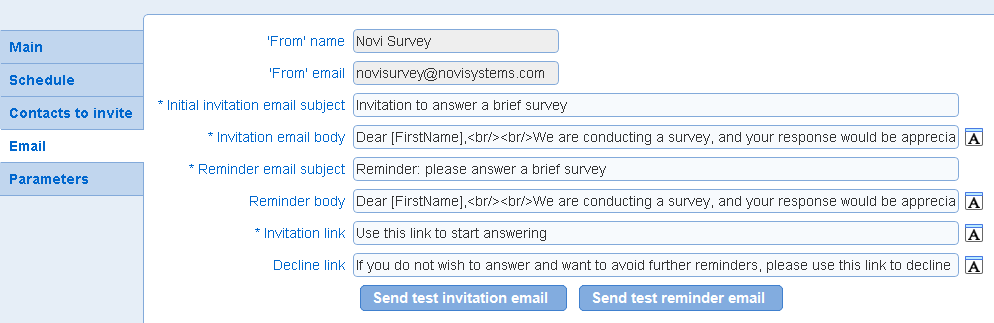
The subject and body of invitations messages can be defined for both the initial invitation and for reminders. If the group is setup to send more than one reminder, the same text is used for all reminders. Note however that it is possible to edit the subject and body of reminder email while the group is processing in the interval of time between the sending of subsequent reminders. The text in the email can be style using the rich text editor for the Invitation email body or the Reminder body.
The text for the link to the survey and the link to decline the survey are specified by the 'Invitation link' and the 'Decline link' fields. The decline link can be removed from the email by editing the body fields and removing tag '[DeclineLink]' from the text in the body.
Buttons 'Send test invitation email' and 'Send test reminder email' send email messages to the user currently logged in for the purpose of inspecting the formatting of the email messages. Note that the invitation link in the test emails cannot be used to enter a response to the survey. To perform a complete test of the invitation sending process, a sample contact group including the testers for the survey should be created and associated to an invitation group.
Both the 'From' name and the 'From' email can be configured for the group. In the on-demand service, the 'From' name is customizable for only some of the plans and the 'From' email cannot be customized.
For more details regarding the functionality of the Email tab, see Invitation group - Email.
Parameters for the invitation group can be set in the Parameters tab.
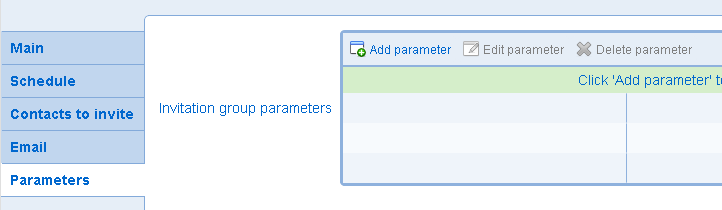
The tab allows to associated values for response parameters to the invitations for the group. The parameters available for the group must be defined in the survey options screen, in the deployment tab. For additional details on the use of parameters in invitation groups, see Invitation group - Parameters.
5. Monitoring of invitation group through the invitation report
The invitation report is accessed with the Invitations Report tool in the invitation group list. The invitations report shows data for either one invitation group or all invitation groups for a survey.

The invitations report contains statistics related to the overall processing the group or groups shown in the report as well as detailed information for each invitation. Functions available i in the invitation report include:
- Download in tabular format of all invitation information including the invitation URL for each invitee
- Management of decline and opt-out for invitees
- Response completion information for each invitee
- The tracking of clicks of the invitation link, the decline link, and the opt out link
- The duplicate and revocation status for each invitation
- Forcing the immediate release of an invitation or a reminder
- Responding to an invitation on behalf of the person invited
- Tracking of bad emails
- The tracking of send failures
For more details, see Invitation report.